Azure Virtual Desktop x WebContent Filtering
Azure Virtual Desktop (#AVD) x WebContent Filtering x Network protection
Welcome to Part II of our security series, this is an updated version you will learn how to protect network traffic in Azure Virtual Desktop.
Prerequisites How to onboard devices to Microsoft Defender for Endpoints How to enable the Web Content Filter
Table of contents
General overview
One of the core pillars of Azure Virtual Desktop is security and with the growing integration of Microsoft Endpoint Manager, I want to take a closer look at the Microsoft Defender for Endpoint and options we have now.
Thanks to reverse connect, your virtual desktops are never exposed to the internet directly (as there is no public IP address assignment required) and your session hosts are reachable by allowing only port 443 to the AVD backplane. Additionally, you have RDP properties, to help you improve the security by putting and addition level of granular control for device redirection, video compression and general session behaviors to your AVD environment.
But once a user is authenticated and connected to the virtual desktop, they are able to surf the web without restrictions!
We want to control this!
Option 1
In Azure and within Microsoft we have multiple options. The most typical one would be: route all the traffic to a proxy or through a firewall where you can apply rules to allow or deny certain web traffic. A great solution can be our Azure Firewall in the premium tier.
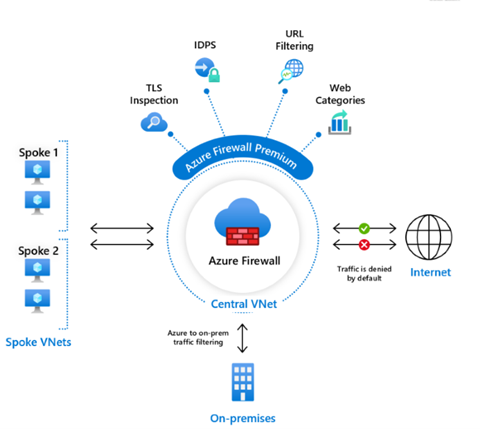
Info: Azure Firewall Premium
Option 2
But there is another, with our Microsoft Defender for Endpoint we offer a new feature called Web Content Filtering.
Web Content Filtering enables you to track and regulate access to websites based on their content categories. Of course not all of this websites are malicious but might be problematic in terms of compliance regulations, bandwidth usage, productivity or other concerns.
Blocking a category prevents users from accessing URLs. For any category that’s not blocked, the URLs are automatically audited. Your users can access the URLs without disruption, and you’ll gather access statistics to help create a more custom policy decision.
Note: Web content filtering is currently in public preview.
This preview version is provided without a service level agreement, and it’s not recommended for production workloads. Certain features might not be supported or might have constrained capabilities. For more information, see Microsoft Defender for Endpoint preview features.
Prerequisites
Before trying out this feature, make sure you meet the following requirements: Windows 10 Enterprise E5, Microsoft 365 E5, Microsoft 365 E5 Security, Microsoft 365 E3 + Microsoft 365 E5 Security add-on or the Microsoft Defender for Endpoint standalone license.
-
Access to Microsoft Defender Security Center portal.
-
Devices running Windows 10 (1607) or later with the latest MoCAMP update.
-
Windows Defender SmartScreen and Network protection enabled.
Configure the Windows Defender for Endpoints
Step 1 - Device onboarding
Devices in your organization must be configured so that the Defender for Endpoint service can get sensor data from them. There are various methods and deployment tools that you can use to configure the devices in your organization.
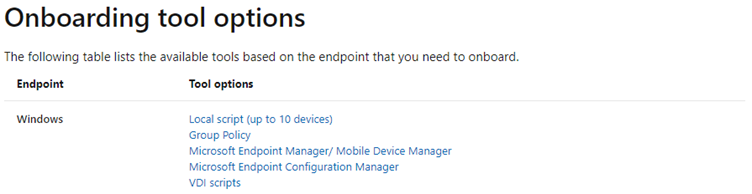
For Windows 10 incl. Windows 10 Multi Session in AVD we have different options.
For the purpose of testing, I used a centrally located script and run it using a domain-based group policy. You can also place the script in the golden image and run it in the same way.
-
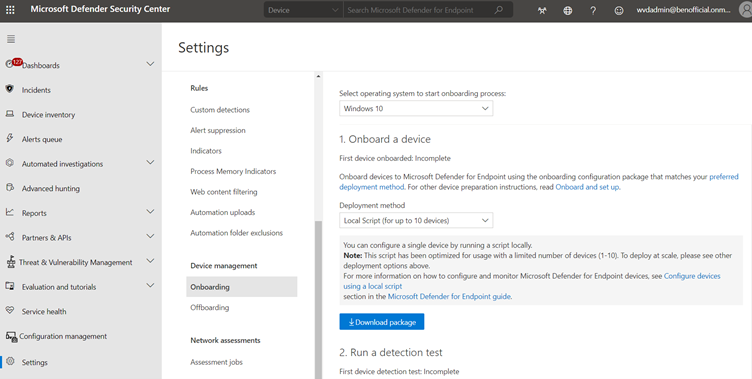
Download the WindowsDefenderATPOnboardingPackage.zip file from the Windows Defender Security Center
-
Open the VDI configuration package .zip file (WindowsDefenderATPOnboardingPackage.zip) In the Microsoft Defender Security Center navigation pane, select Settings > Onboarding.
-
Select Windows 10 as the operating system.
-
In the Deployment method field, select VDI onboarding scripts for non-persistent endpoints.
-
Click Download package and save the .zip file.
-
Extract the contents of the .zip file to a shared, read-only location that can be accessed by the device. You should have a folder called OptionalParamsPolicy and the files WindowsDefenderATPOnboardingScript.cmd and Onboard-NonPersistentMachine.ps1.
The full documentation for the onboarding is here: Onboard Windows 10 multi-session devices in Windows Virtual Desktop
Optional: If you want to go crazy you can do the onboarding via MEM - select Endpoint Security and Create a device configuration profile to configure Microsoft Defender for Endpoint
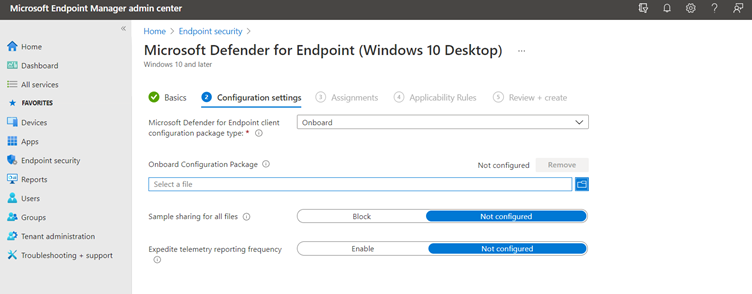
Resource: Onboard devices to the Microsoft Defender for Endpoint service
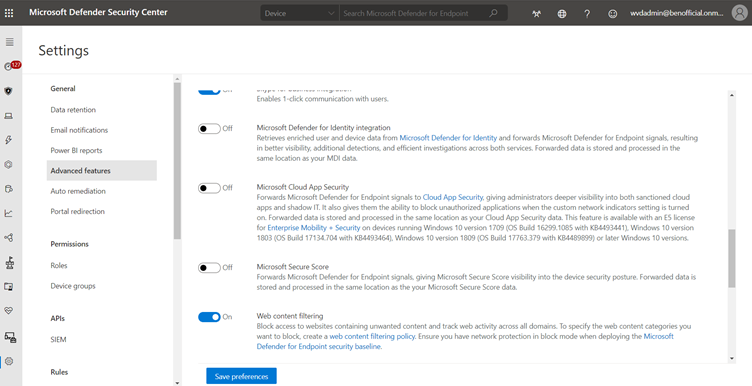
Step 2 - Turn on the web content filtering feature.
-
Logon to the Microsoft Defender Security Center portal (https://securitycenter.windows.com)
-
From the left-hand navigation menu, select Settings > General > Advanced Features. Scroll down until you see the entry for Web content filtering and switch the toggle to On and Save preferences.
Step 3 - Configure web content filtering policies
Web content filtering policies specify which site categories are blocked on which device groups. To manage the policies, go to Settings > Rules > Web content filtering.
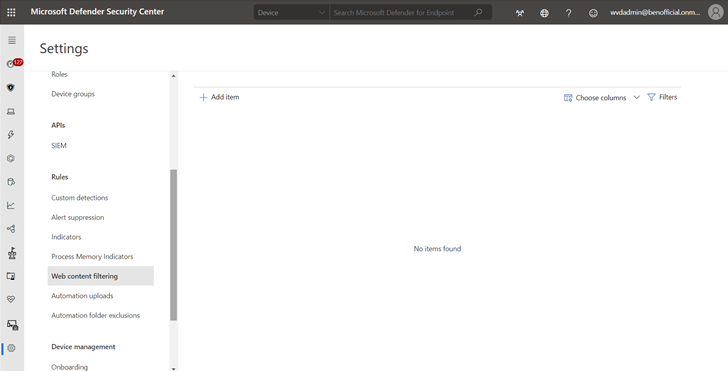
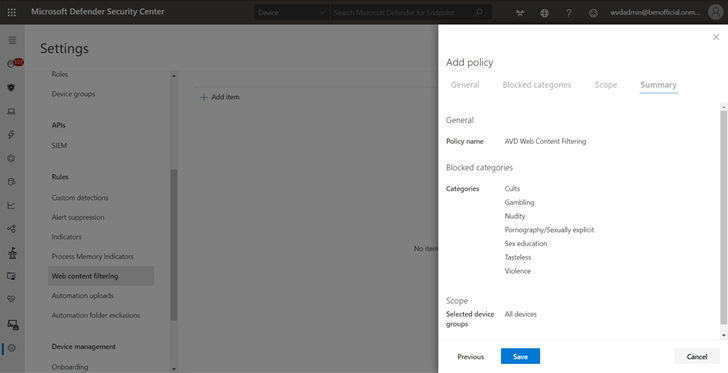
Create a policy To add a new policy:
-
Select Add policy on the Web content filtering page in Settings.
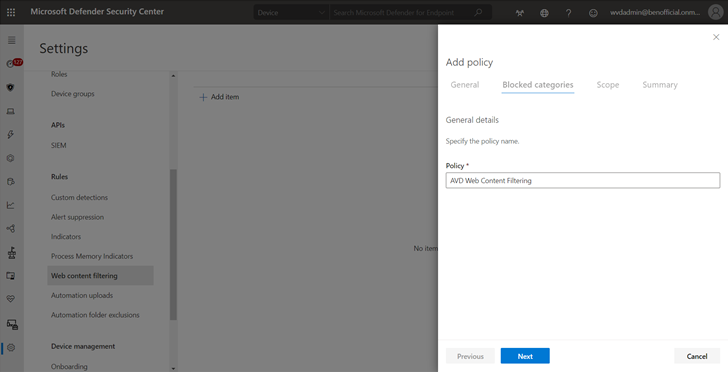
-
Specify a name.
- Select the categories to block. Use the expand icon to fully expand each parent category and select specific web content categories.
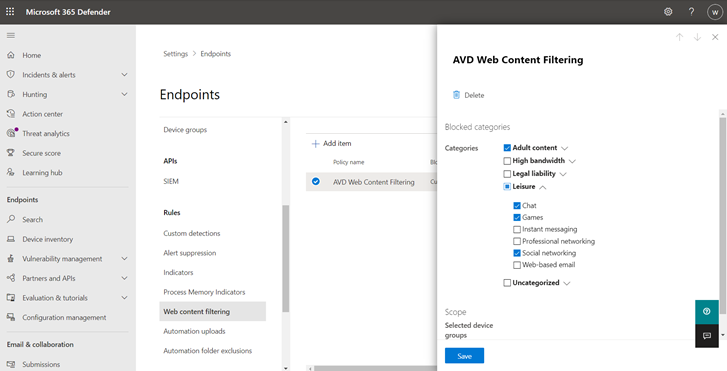
- Specify the policy scope. Select the device groups to specify where to apply the policy. Only devices in the selected device groups will be prevented from accessing websites in the selected categories.

- Review the summary and save the policy.
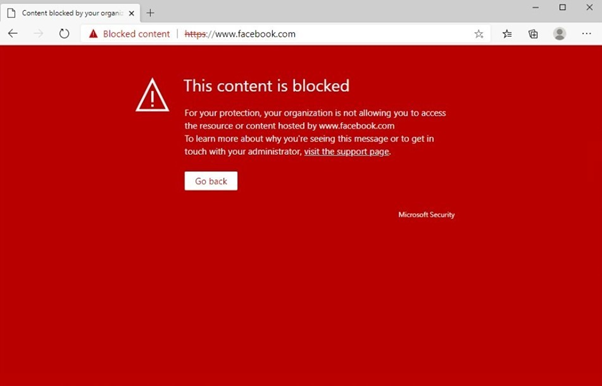
Let’s connect to an AVD session hosts, start a browser (Microsoft Edge, Chrome, Firefox, Brave and Opera) and try to access a website with a blocked category.
Note: The policy refresh may take up to 2 hours to apply to your selected devices.
Conclusion
If you are looking for a quick and easy way to control web content, with a central management for all your endpoints and without deploying additional infrastructure, the Microsoft Defender and the Web Content Filter is a great solution. Looking for more? Check the full documentation here: Web Content Filtering