Azure Virtual Desktop x Priviliged Identiy Management
Azure Virtual Desktop (#AVD) x Priviliged Identiy Management (#PIM)
It’s all about security 😅 at least for many of my latest projects and all of them want more security! And there is one question, can we use Azure Virtual Desktop (#AVD) Session Host and Privileged Identity Management (PIM) to add an additional layer of security?
Yes - we CAN! With the growing support of Azure AD joined virtual machines and more and more supported features like Trusted Launch, TPM etc., we do have more and more possibilities to control access. Imagine an administrator accessing confidential systems (you name it) which requires an approval before performing maintenance tasks.
In this first post we will cover how to use Azure PIM to control access to an AVD session host. And in the second post (coming soon): How to add and use PowerApps for an much simpler request an approval process.
We will not cover additional hardening with MFA, Conditional Access, Networking etc. You can find some of this here 👉How to restrict surfing on #AVD session hosts user Microsoft Defender for Endpoint or Enable Screen Capture Protect on Azure Virtual Desktop #AVD with Microsoft Endpoint Manager #MEM
Table of contents
- First of all, what is PIM?
- What does it do?
- License requirements
- Prerequisites
- Lets get started!
- Conclusion
First of all, what is PIM?
Privileged Identity Management (PIM) is a service in Azure Active Directory (Azure AD) that enables you to manage, control, and monitor access to important resources in your organization. These resources include resources in Azure AD, Azure, and other Microsoft Online Services such as Microsoft 365 or Microsoft Intune.
What does it do?
Privileged Identity Management provides time-based and approval-based role activation to mitigate the risks of excessive, unnecessary, or misused access permissions on resources that you care about. Here are some of the key features of Privileged Identity Management:
- Provide just-in-time privileged access to Azure AD and Azure resources
- Assign time-bound access to resources using start and end dates
- Require approval to activate privileged roles
- Enforce multi-factor authentication to activate any role
- Use justification to understand why users activate
- Get notifications when privileged roles are activated
- Conduct access reviews to ensure users still need roles
- Download audit history for internal or external audit
- Prevents removal of the last active Global Administrator role assignment
License requirements
Using this feature requires an Azure AD Premium P2 license. To find the right license for your requirements, see Compare generally available features of Azure AD.
Prerequisites
A full functional Azure AD joined session host
- An Azure AD P2 License You need at least the role of a Privileged Role Administrator or Global Administrator
Lets get started!
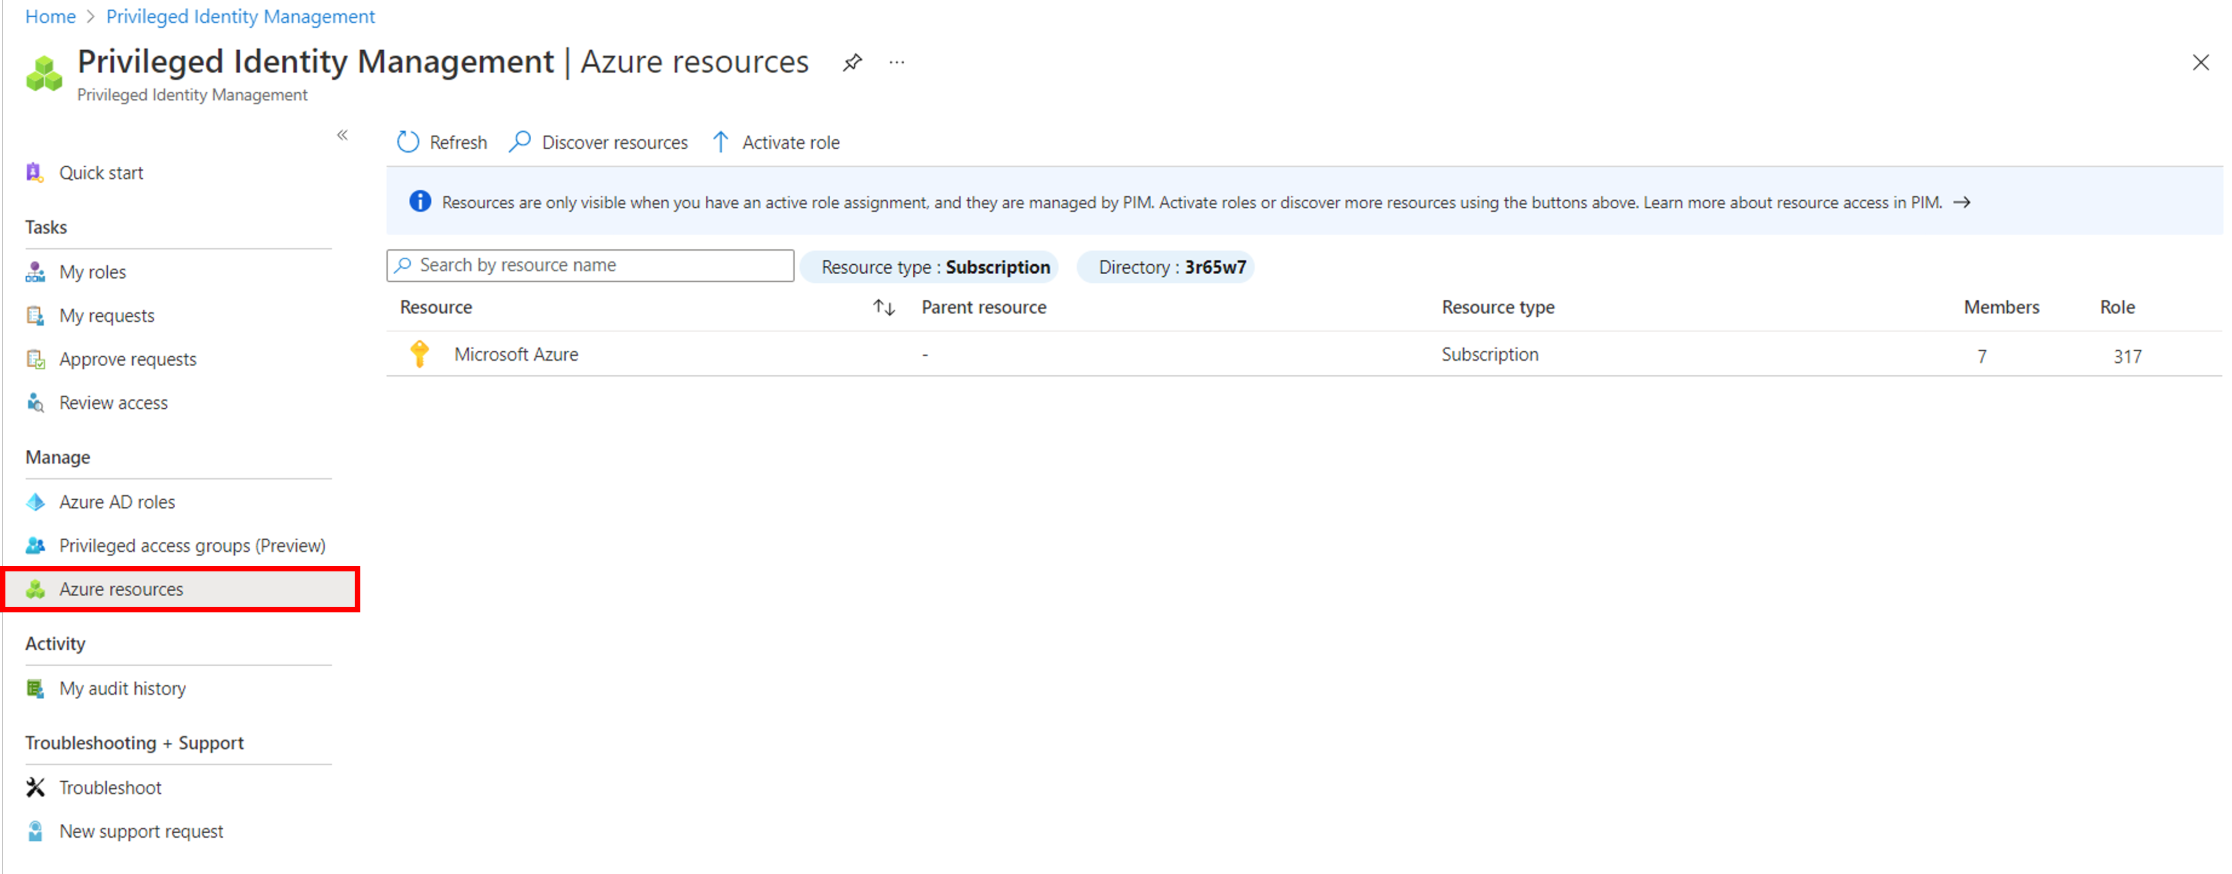
Configure PIM as a Privileged Role Administrator or Global Administrator. In the Azure Portal, open PIM, select Azure resources and your subscription.
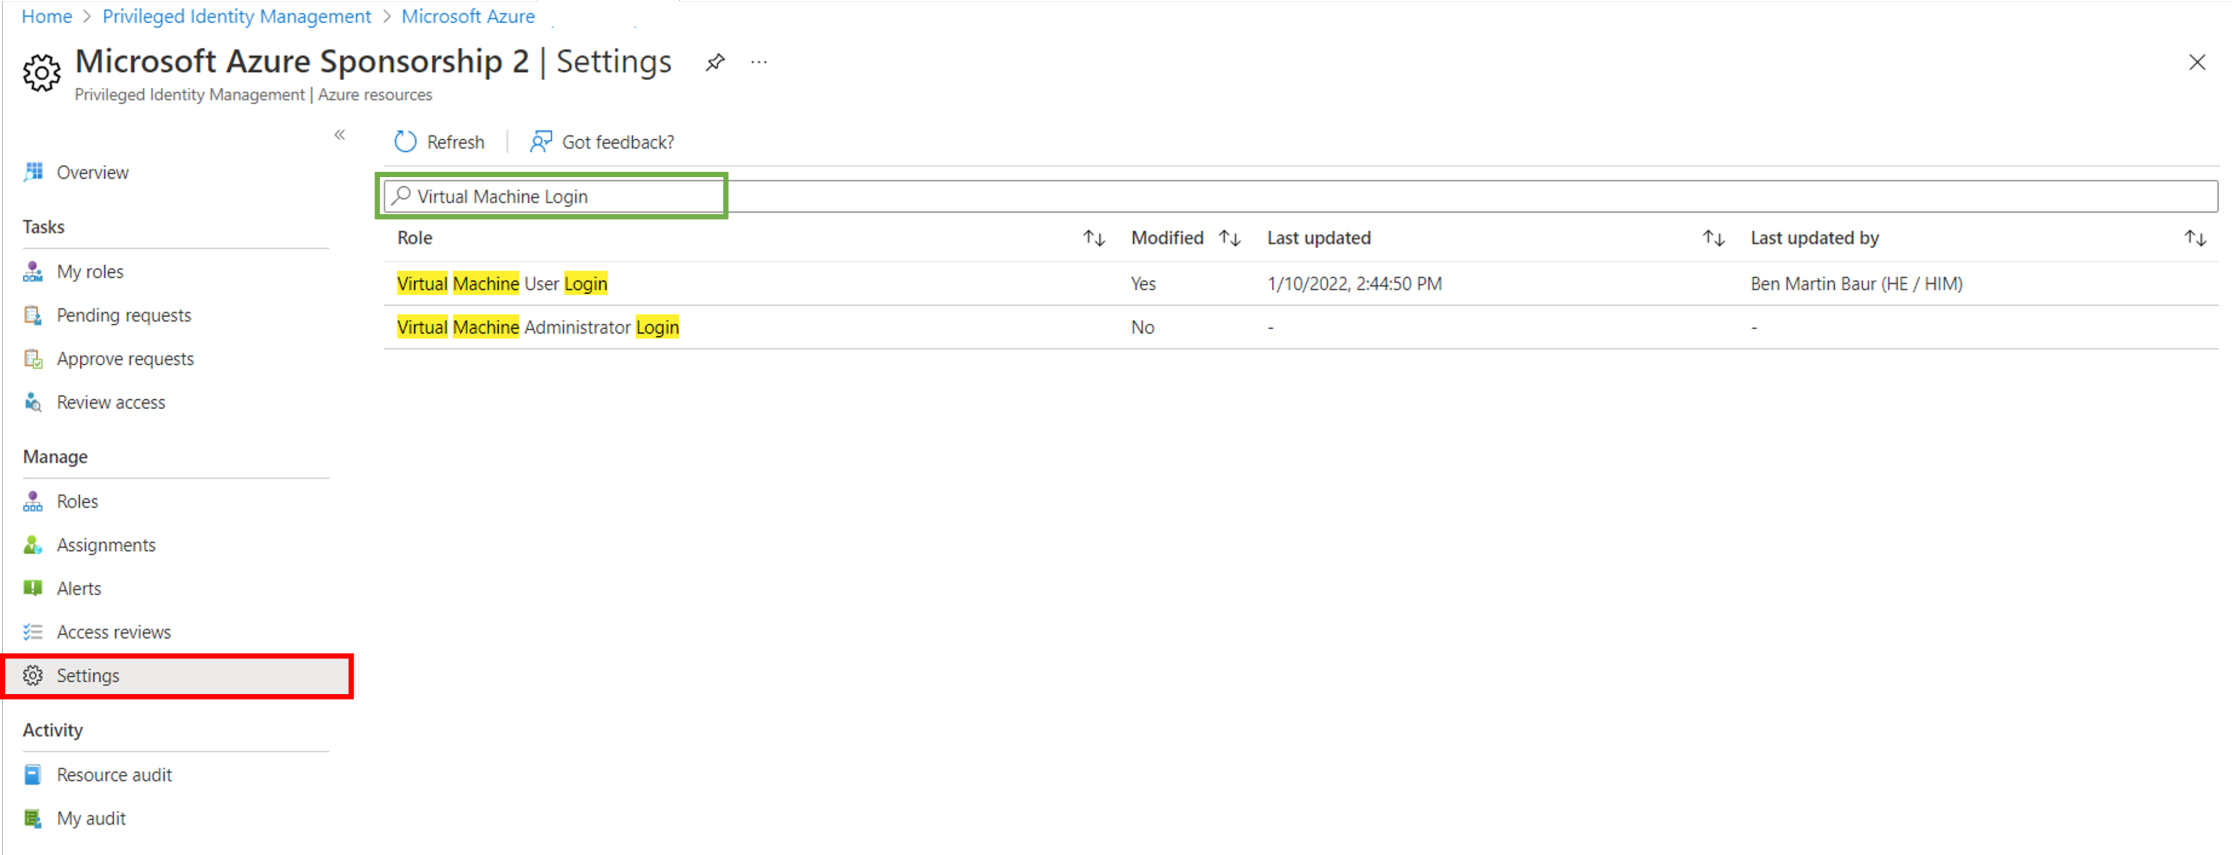
The first thing we want to do is to configure the Settings for the (1) Virtual Machine Administrator Login, for local admin access or (2) Virtual Machine User Login, for user access.
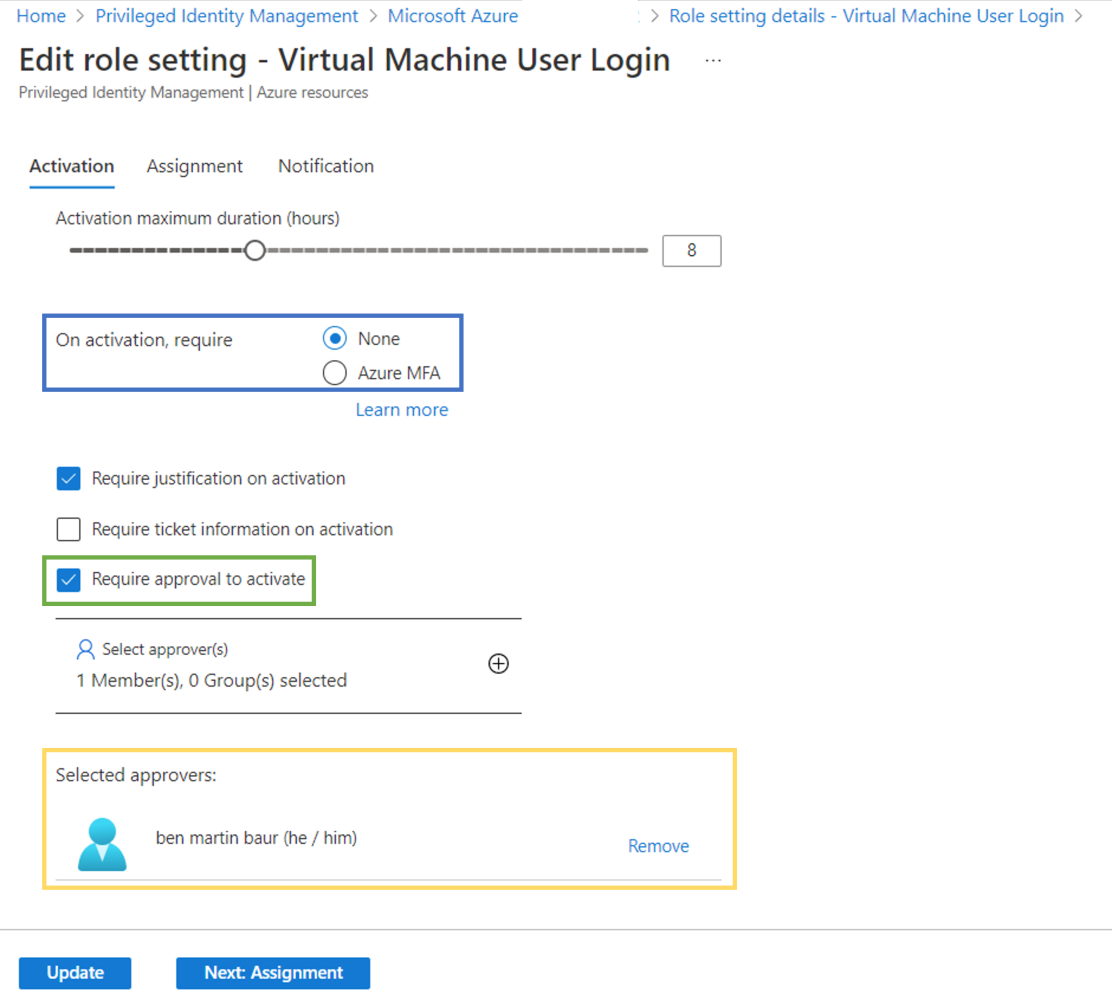
In the Settings menu, make sure you select “Require approval for activate” and select an approver. Additionally you can force MFA for the activation process.
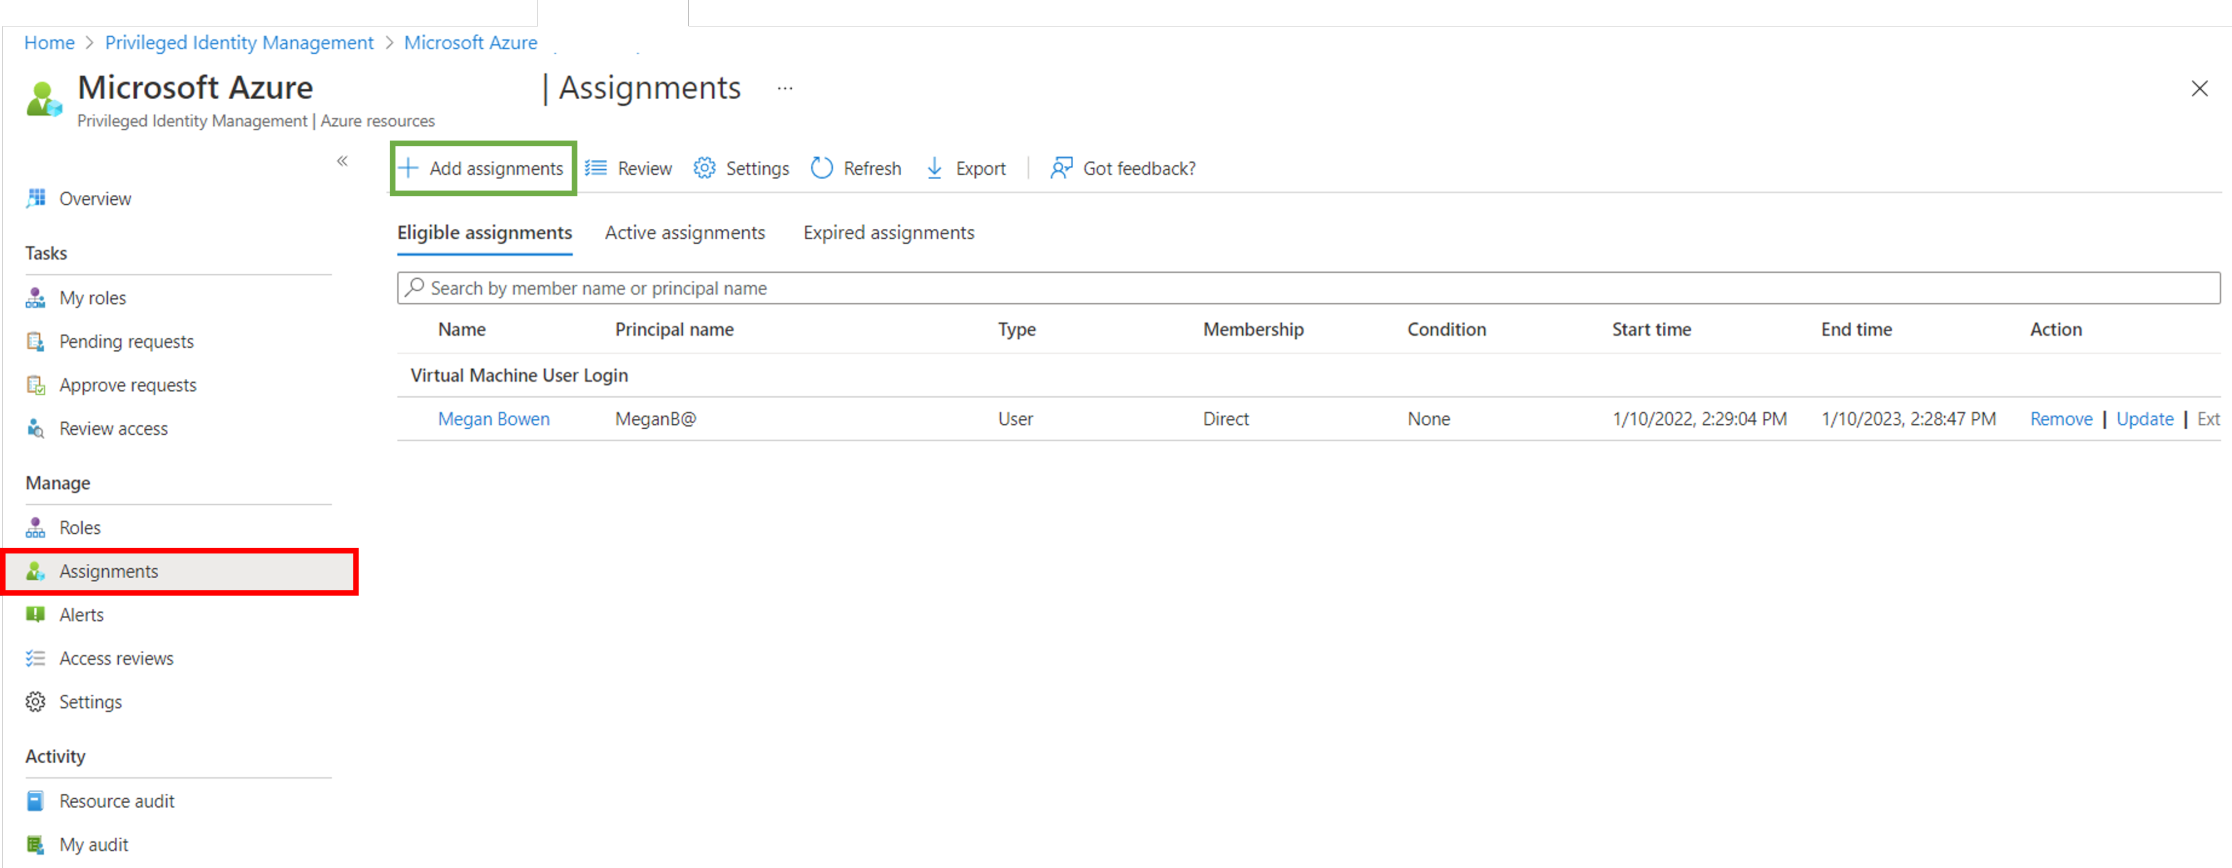
Next, we configure the Eligible assignments. Open Assignments and select Add assignment. Choose the eligible use and click create. Additionally you can define a maximum duration if required or needed.
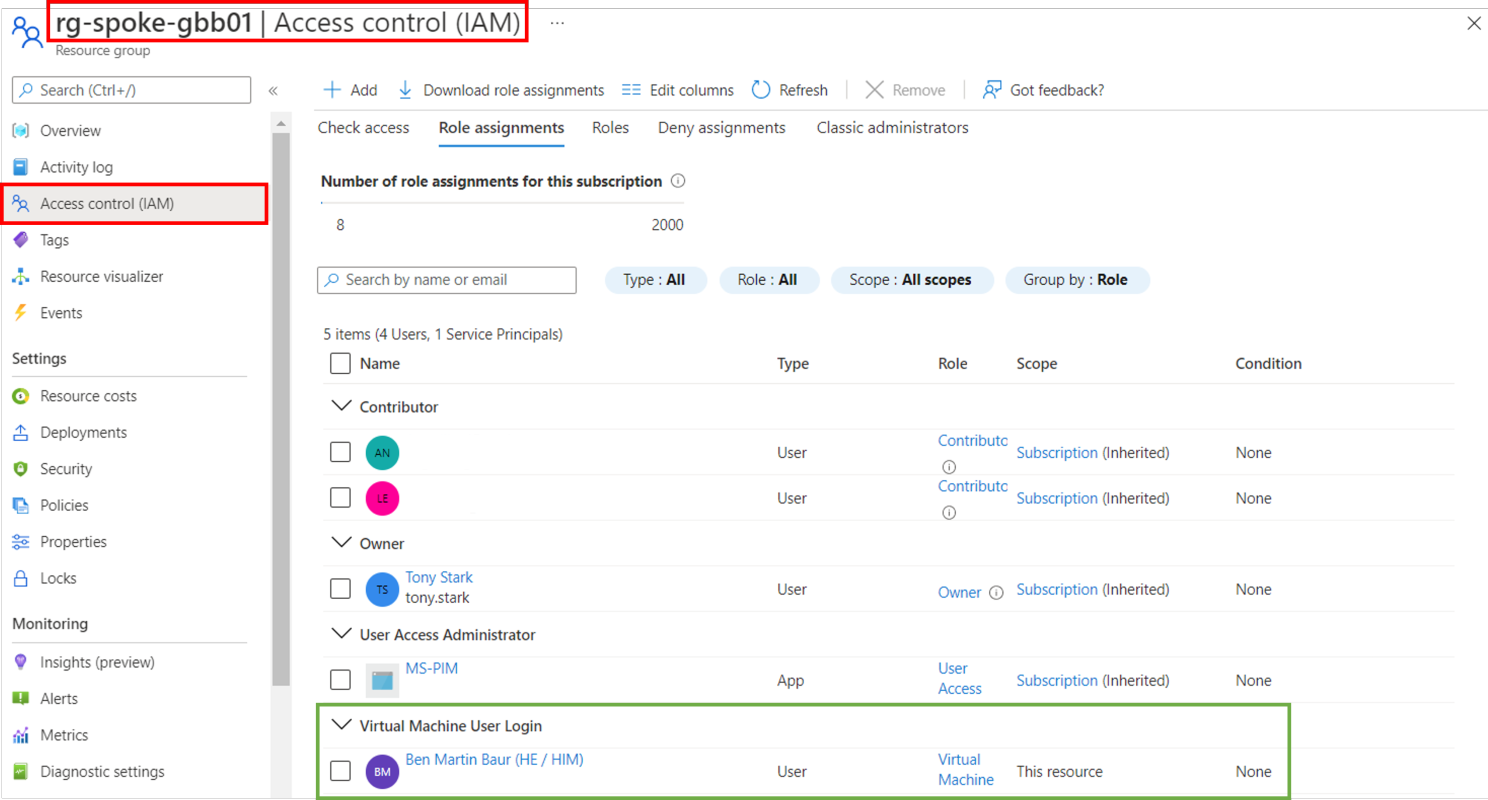
Lastly make sure your AAD joined session hosts have the right IAM roles assigned, again: (1) Virtual Machine Administrator Login, for local admin access or (2) Virtual Machine User Login, for user access.
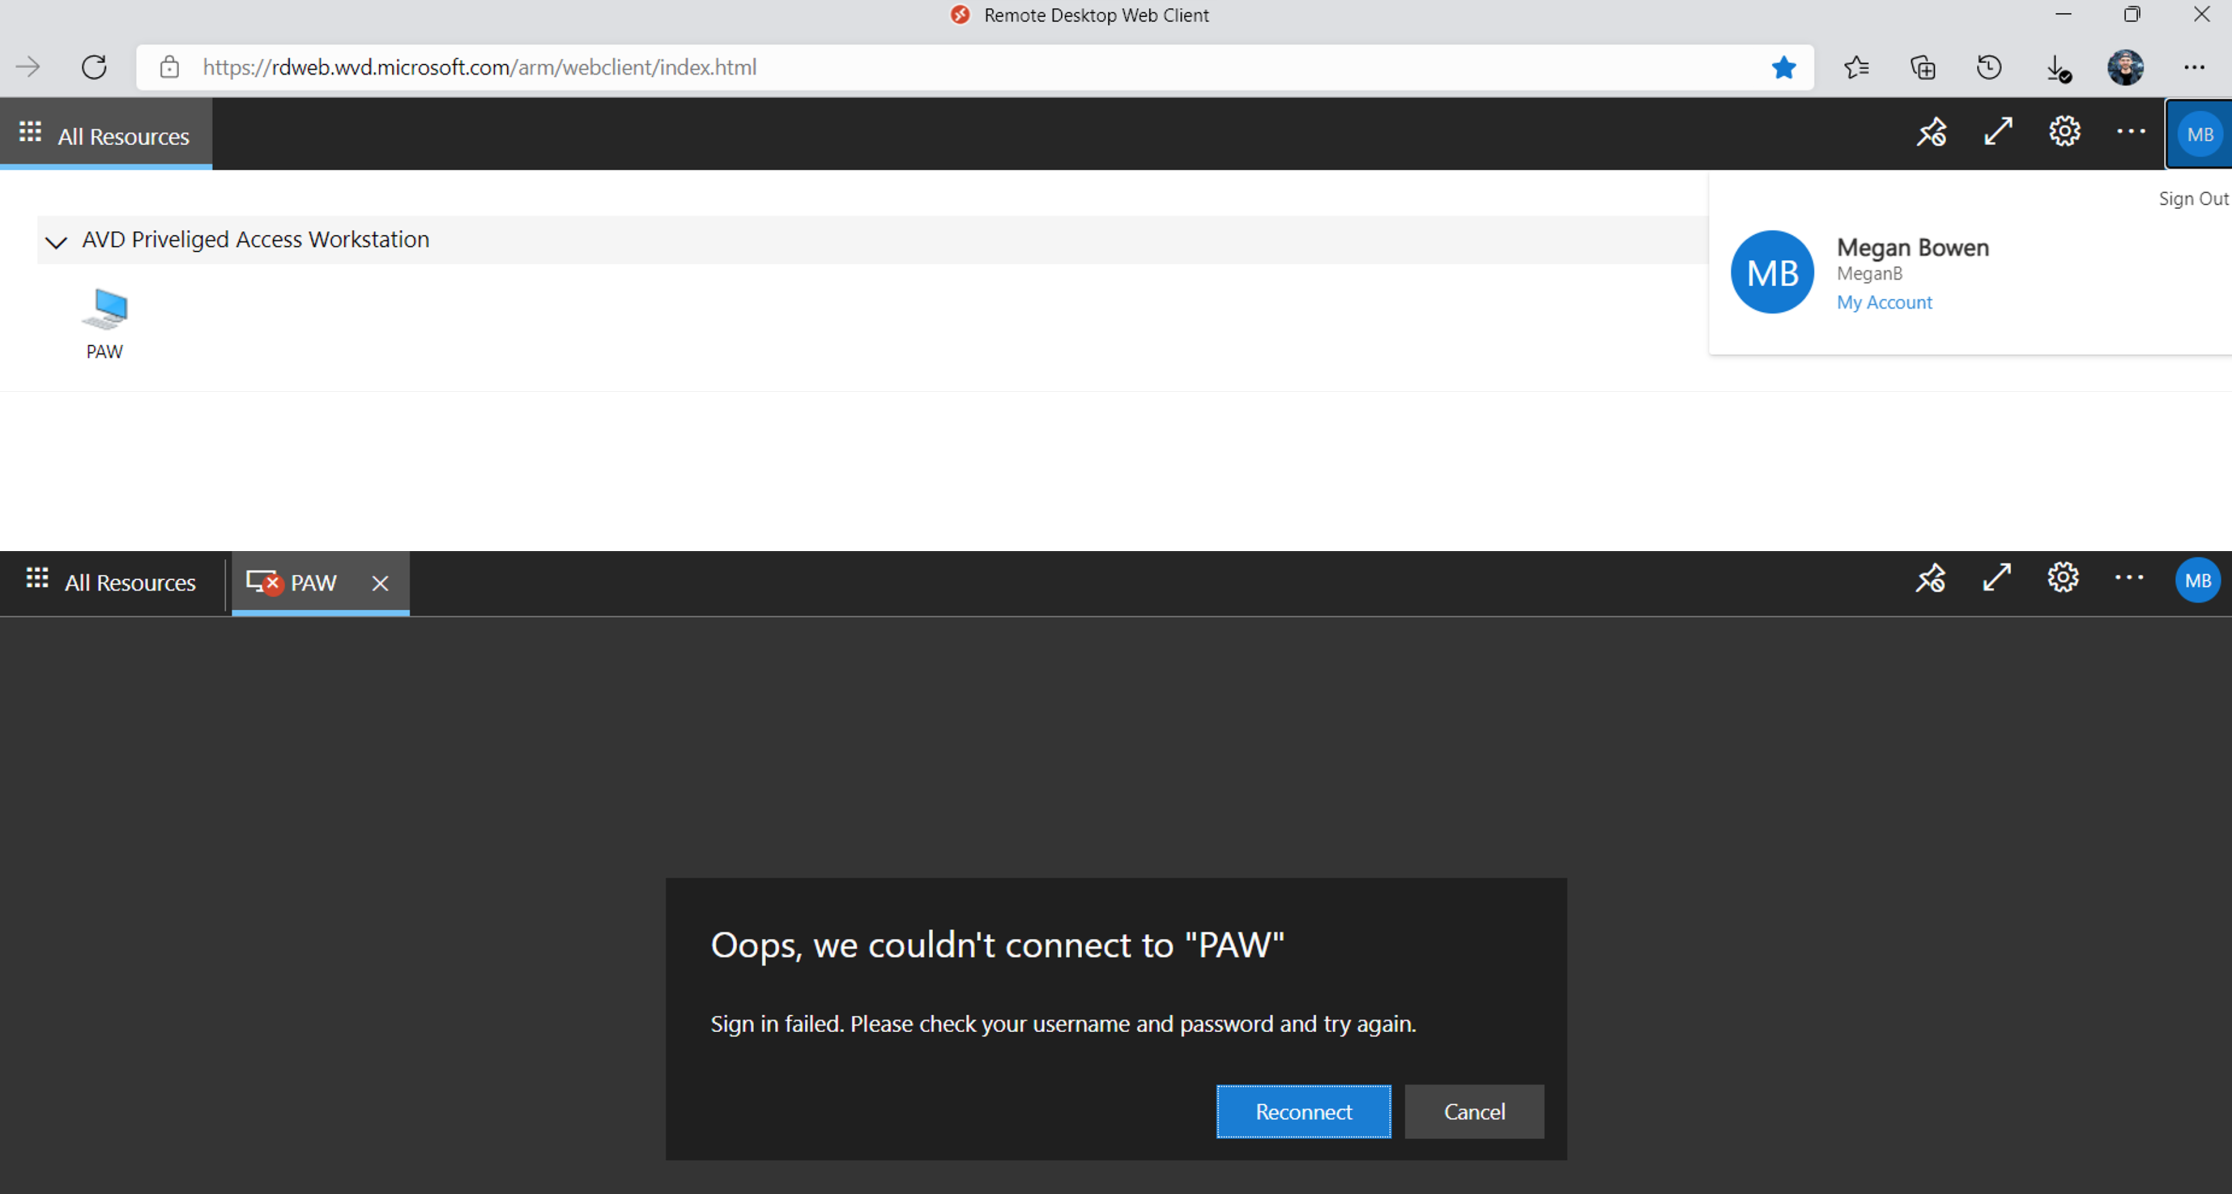
Let try it to access the desktop without approval and you will see the message: Oops, we couldn’t connect to sessionhost
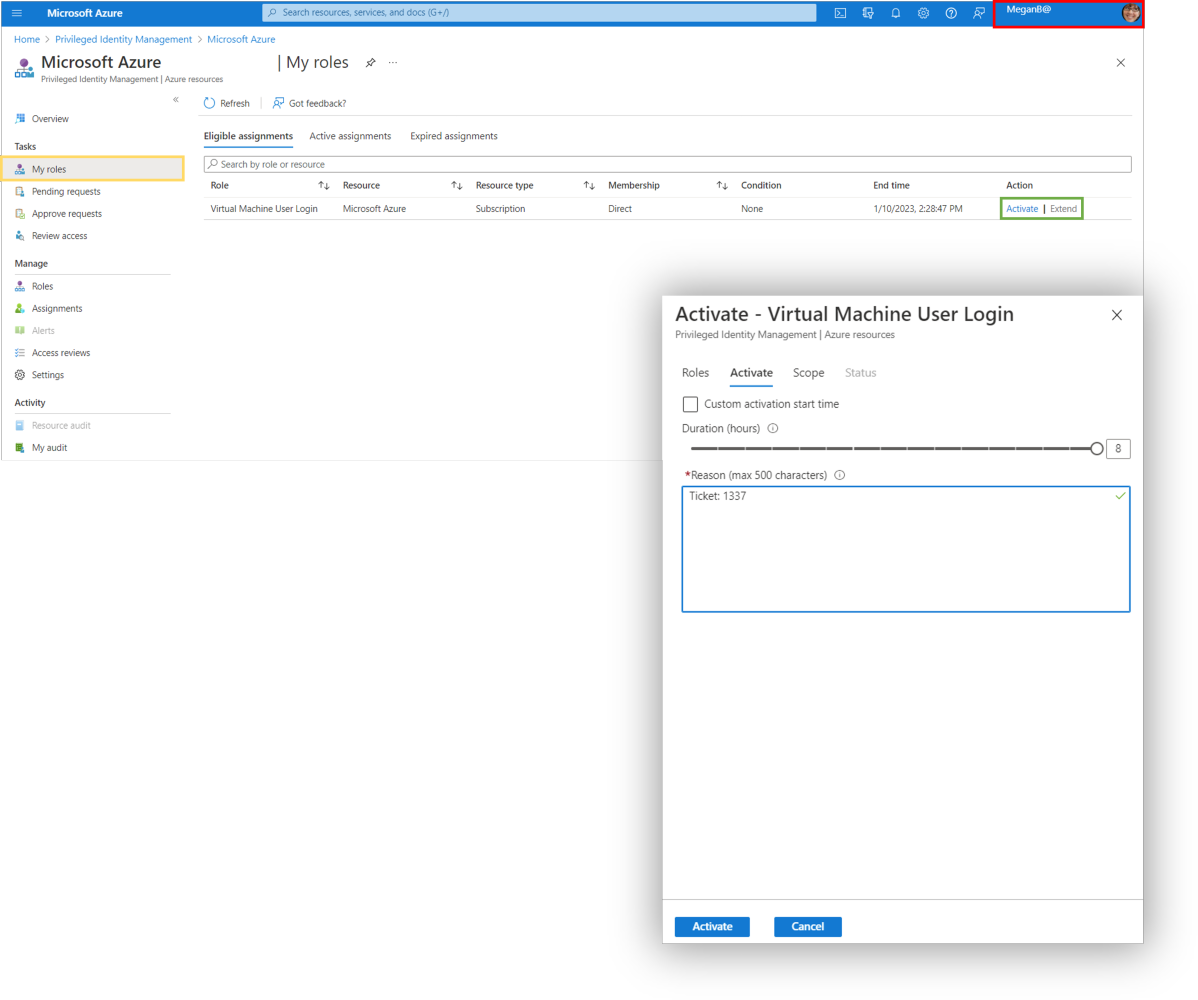
Logon to the Azure Portal with the User (Requester) and open PIM, and select my roles and request the role. Enter a description why you want the access.
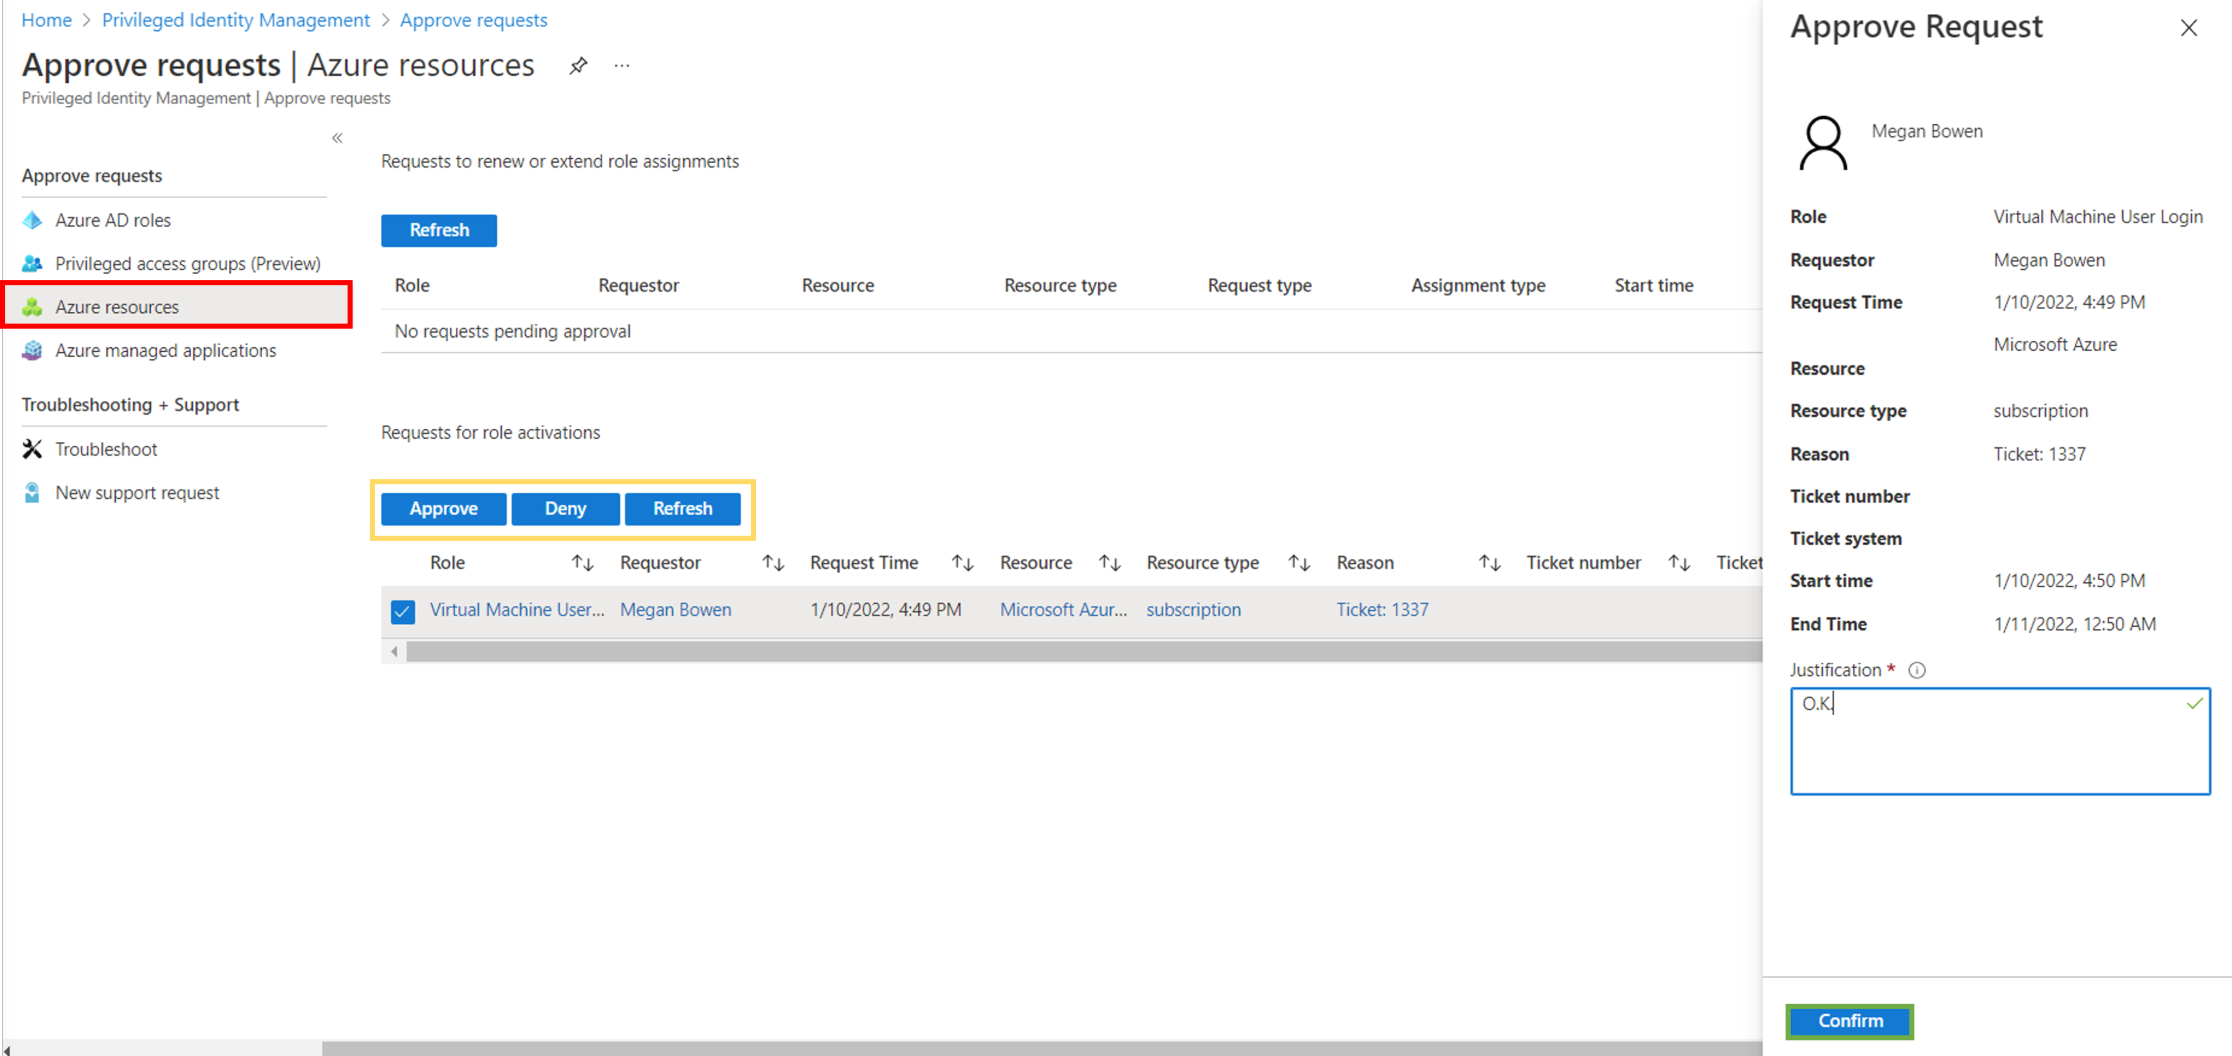
Switch to the Approver, check for open request and approve the request.
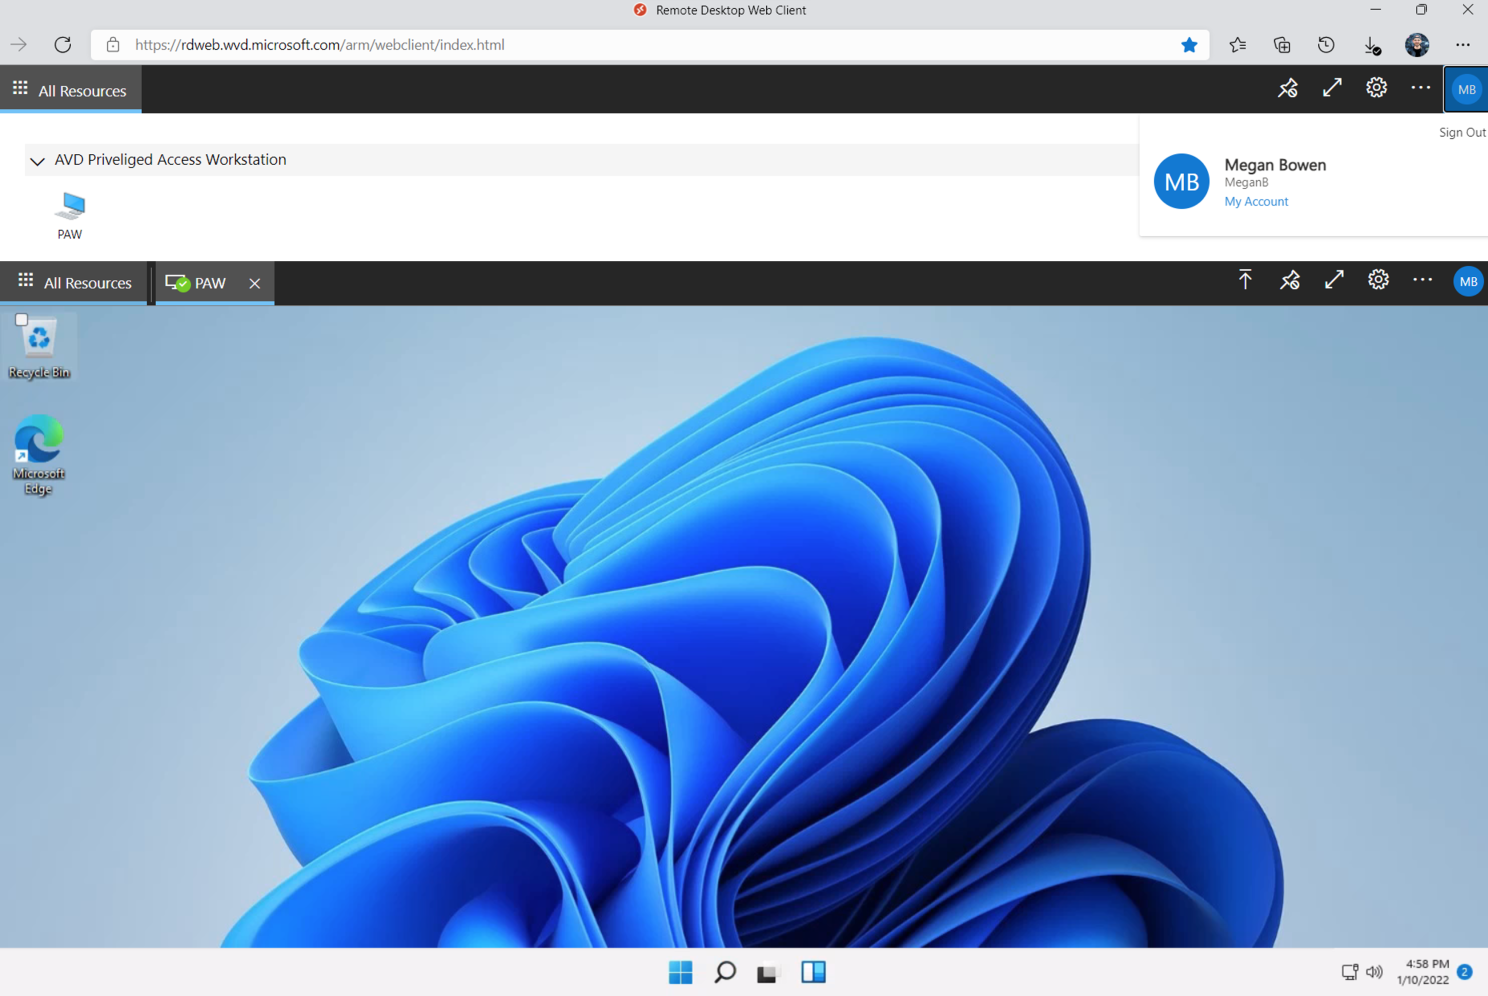
One more time go back to the Web Client and test the access, BANG! ITWORKS.
In a final check you can revoke the assignment. SPOILER, you can establish a session then.
Conclusion
Security is key and with PIM we can add an additional layer of security to our AVD environment. It’s still a long way for a real “Privileged Access Workstation” but we are getting there step by step 😉. Stay tuned for the second part of this post when we create a PowerApp for the Request process, so your End user doesn’t need to access the Azure Portal.
Resources
https://docs.microsoft.com/en-us/azure/active-directory/privileged-identity-management/pim-configure
https://docs.microsoft.com/en-us/azure/virtual-desktop/deploy-azure-ad-joined-vm