
This article is designed to give you an overview of how to optimize your Azure Virtual Desktop (#AVD) virtual machines managed by Intune and based on the Windows 10/11 multi-session operating system.
Table of contents
- How to configure profiles
- Windows 11/10 multi-session settings (Computer Settings only)
- How to import an Intune device configuration profile
- Where is the option “gpupdate /force”?
- Troubleshooting
How to configure profiles
- Open the Intune Console and sign-in with your Intune Administrator or different user who has enough permission to configure Windows policies.
- Navigate to Devices > Windows > Configuration profiles and click on Create profile.
- Select Windows 10 and later as the Platform and Settings catalog (preview) as the Profile type. Then click on Create.

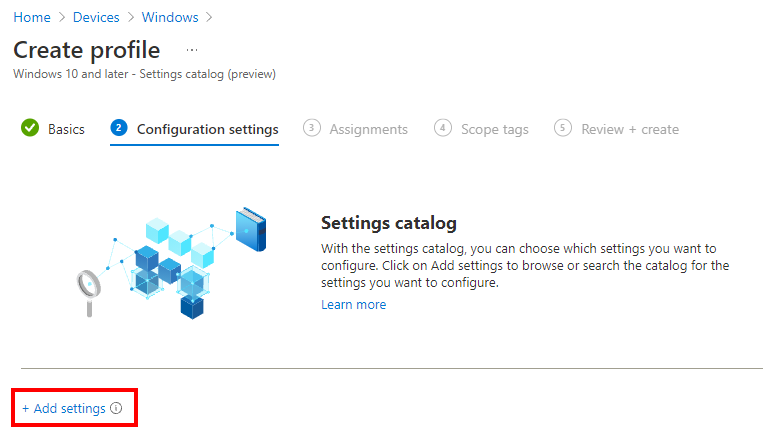
- Enter your profile name following your naming convention and Next.
- Click on Add settings to open the settings catalog.
- Add the following filter in the settings picker to get only the supported settings for Windows 10/11 Enterprise multi-session.

- Now you can search for a setting and enable this setting for your profile.
Note: The user settings are shown as (users).
- After pick your settings, you need to configure these settings and click on Next.
- Assign this profile to a device or user group for non-multi-session operating systems and Next.
- Configure a Scope tag if needed otherwise Next and then Review + create for creating this Configuration Profile.
Windows 11/10 multi-session settings
User & Device settings for Windows 11/10 multi-session are now in generally available. See more details here.
These computer settings are based on the Virtual-Desktop-Optimization-Tool:
| Setting | Value | |
|---|---|---|
| Force a specific default lock screen and logon image | Enabled | |
| Path to lock screen image: (Device) | C:Windowswebscreenimg105.jpg | |
| Turn off fun facts, tips, tricks, and more on lock screen (Device) | True | |
| Allow BITS Peercaching | Disabled | |
| Do not allow the computer to act as a BITS Peercaching client | Enabled | |
| Do not allow the computer to act as a BITS Peercaching server | Enabled | |
| Specify passive polling | Enabled | |
| Disable passive polling (Device) | True | |
| Turn off “Found New Hardware” balloons during device installation | Enabled | |
| Continue experiences on this device | Disabled | |
| Turn off access to all Windows Update features | Enabled | |
| Turn off Event Viewer “Events.asp” links | Enabled | |
| Turn off Help and Support Center “Did you know?” content | Enabled | |
| Turn off Help and Support Center Microsoft Knowledge Base search | Enabled | |
| Turn off Registration if URL connection is referring to Microsoft.com | Enabled | |
| Turn off Search Companion content file updates | Enabled | |
| Turn off Windows Customer Experience Improvement Program | Enabled | |
| Turn off Windows Update device driver searching | Enabled | |
| Do not display the Getting Started welcome screen at logon | Enabled | |
| Show clear logon background | Enabled | |
| Turn off System Restore | Enabled | |
| Configure Scheduled Maintenance Behavior | Disabled | |
| Execution Level (Device) | Regular | |
| Configure Security Policy for Scripted Diagnostics | Disabled | |
| Troubleshooting: Allow users to access and run Troubleshooting Wizards | Disabled | |
| Troubleshooting: Allow users to access online troubleshooting content on Microsoft servers from the Troubleshooting Control Panel (via the Windows Online Troubleshooting Service – WOTS) | Disabled | |
| Turn off Inventory Collector | Enabled | |
| Set the default behavior for AutoRun | Enabled | |
| Default AutoRun Behavior | Do not execute any autorun commands | |
| Do not allow window animations | Enabled | |
| Do not show the ‘new application installed’ notification | Enabled | |
| Prevent the computer from joining a homegroup | Enabled | |
| Allow Microsoft services to provide enhanced suggestions as the user types in the Address bar | Disabled | |
| Turn off sensors | Enabled | |
| Turn off Windows Location Provider | Enabled | |
| Do Not Show First Use Dialog Boxes | Enabled | |
| Allow Configuration Update For Books Library | Block | |
| Allow Prelaunch | Block | |
| Allow Web Content On New Tab Page | Block | |
| Always Enable Books Library | Disabled | |
| DO Download Mode | 9 – Simple download mode with no peering. Delivery Optimization downloads using HTTP only and does not attempt to contact the Delivery Optimization cloud services. Added in Windows 10 Version 1607. | |
| Allow Find My Device | Block | |
| Configure Chat Icon | Disabled | |
| Do Not Show Feedback Notifications | Feedback notifications are disabled. | |
| Allow Edge Swipe | Block | |
| Allow Offline Maps Download Over Metered Connection | Disabled.Force disable auto-update over metered connection. | |
| Allow Game DVR | Block | |
| Allow user feedback | Disabled | |
| Automatically import another browser’s data and settings at first run | Enabled | |
| Automatically import another browser’s data and settings at first run (Device) | Disables automatic import and the import section of the first-run experience is skipped | |
| Block all ads on Bing search results | Enabled | |
| Hide the First-run experience and splash screen | Enabled | |
| Disable Advertising ID | Disabled | |
| Allow Online Tips | Block | |
| Allow Disk Health Model Updates | Do not allow | |
| Allow Linguistic Data Collection | Block | |
| Allow widgets | Not allowed | |
| Manage Preview Builds | Disable Preview builds |
The settings for chat icon and widgets are effective only on Windows 11.
How to import an Intune device configuration profile
You can automatically provide these settings in the Intune configuration profile via MS Graph or via Intune portal. However, you need a template file with all the optimized settings. Here you can download our exported JSON policy template file.
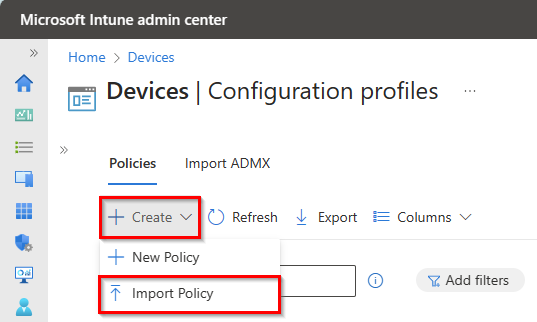
First open the Micorosft Intune Admin Center (https://in.cmd.ms) and then navigate to Devices and Configuration Profiles.
Next, click on Create and then select Import policy to import a policy from a JSON file.
This Intune Import Policy feature is currently in public preview.
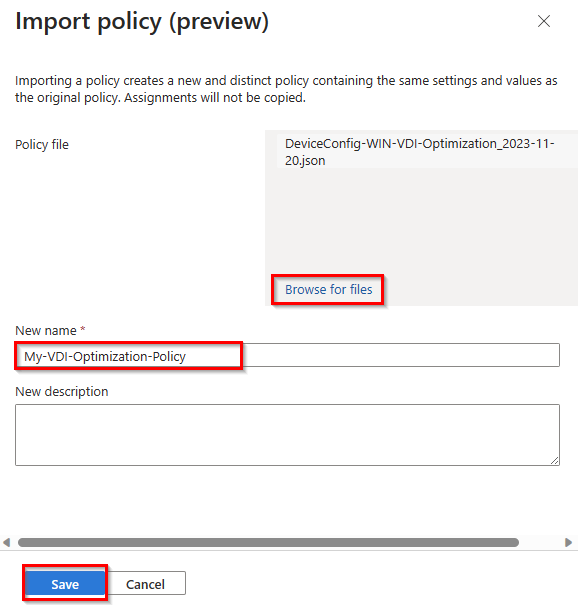
Select the policy template file (JSON), e.g. DeviceConfig-WIN-VDI-Optimization_2023-11-20.json, and enter a name for your new device configuration profile, then click Save.
And now your VDI optimization device configuration profile is available and you can change the settings.
Where is the option “gpupdate /force”?
Short answer: It’s gone and it’s not coming back. Without Hybrid-Joined Machine, Active Directory features like Group Policy objects are not available. Azure Active Directory connected machines are managed only by Intune configuration profiles.
However, there is a way to manually synchronize the latest MDM settings from the client. Run the following commands in the evaluated Powershell:
Get-ScheduledTask | ? {$_.TaskName -eq "PushLaunch"} | Start-ScheduledTask
Get-ScheduledTask | ? {$_.TaskName -eq "Schedule to run OMADMClient by client"} | Start-ScheduledTask
As Administrator, you will find many Schedule Tasks for the MDM Synchronization under Microsoft > Windows > EnterpriseMgmt > GUID in the Task Scheduler. In addition, it is shown at which times the sync is executed automatically (Schedule #1 to #3).

If you want to perform synchronization from the Endpoint Manager / Intune administration panel, you can select your Windows 10/11 device and use the “Sync” button.

It takes some time for the check-in time to be updated in the device overview table.
Troubleshooting
How to collect logs directly from the client
Windows 10/11 includes a MDM diagnostic tool called mdmdiagnosticstool.exe that collects all information and log files from the client directly to a CAB, XML or ZIP file.
The commands can be performed via CMD or Powershell.
The output paths are examples and must be modified to best fit your environment.
This command creates a collection of all important log files, which in most cases help to solve the problems.
mdmdiagnosticstool.exe -out C:UsersPublicDocumentsHere is an example for output:
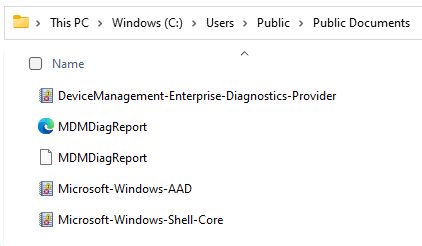
The file MDMDiagReport.html gives a good overview of the MDM status and which policies are applied and which are not. It is comparable to the good old gpresult tool.
For deeper analysis, you can use this command to create a CAB file that contains more event logs, tpm information, and more.
mdmdiagnosticstool.exe -area DeviceEnrollment;DeviceProvisioning;Autopilot -cab C:UsersPublicDocumentsMDMDiagReport.cabHow to see applied configuration profiles in Intune
- Open the Microsoft Endpoint Manager and sign-in with your Intune Administrator or different user who has enough permission to configure Windows policies.
- Navigate to Devices > Windows and select the device you want to check.
- Open the Device Configuration and select the settings catalog policy.
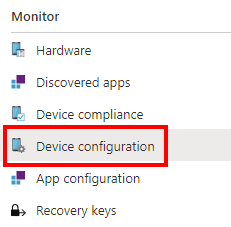
- Then you will get an overview of all settings, whether they were applied, failed or not applied. You can click on each setting to get more information, for example about the error message.
The status “Not applicable” means that specific settings are not supported by the Windows version or edition running on the VM.