Setting up a consistent and ready-to-code development environment can be time-consuming, especially when onboarding new developers in cloud-first organizations. Microsoft Dev Box is a desktop-as-a-service (DaaS) solution designed specifically for developers. It provides self-service access to ready-to-code cloud workstations. But in early October 2025, Microsoft announced that Dev Box capabilities are being integrated into Windows 365. As part of this transition, starting 1stNovember 1 2025, it will no longer be possible to initiate new Dev Box projects or deployments.
In short: Dev Box features will soon be available in Windows 365, and starting 1st November 2025, you will need to create Dev Boxes or developer PCs with Windows 365 functionality.
In this blog post, we’ll walk through a workaround that enables you to leverage the Microsoft Dev Box Gallery image — which includes Visual Studio and essential developer tools — by creating a managed image, importing it into Windows 365, and deploying it to your Cloud PCs.
Create a Managed Image from the Dev Box Image
To build a managed image based on the Microsoft Dev Box Marketplace offering, start by creating a new virtual machine. This image comes preloaded with essential developer tools, including:
Visual Studio 2022 (Community, Professional, or Enterprise)
Visual Studio Code
Windows Subsystem for Linux (WSL)
Additional productivity and development utilities
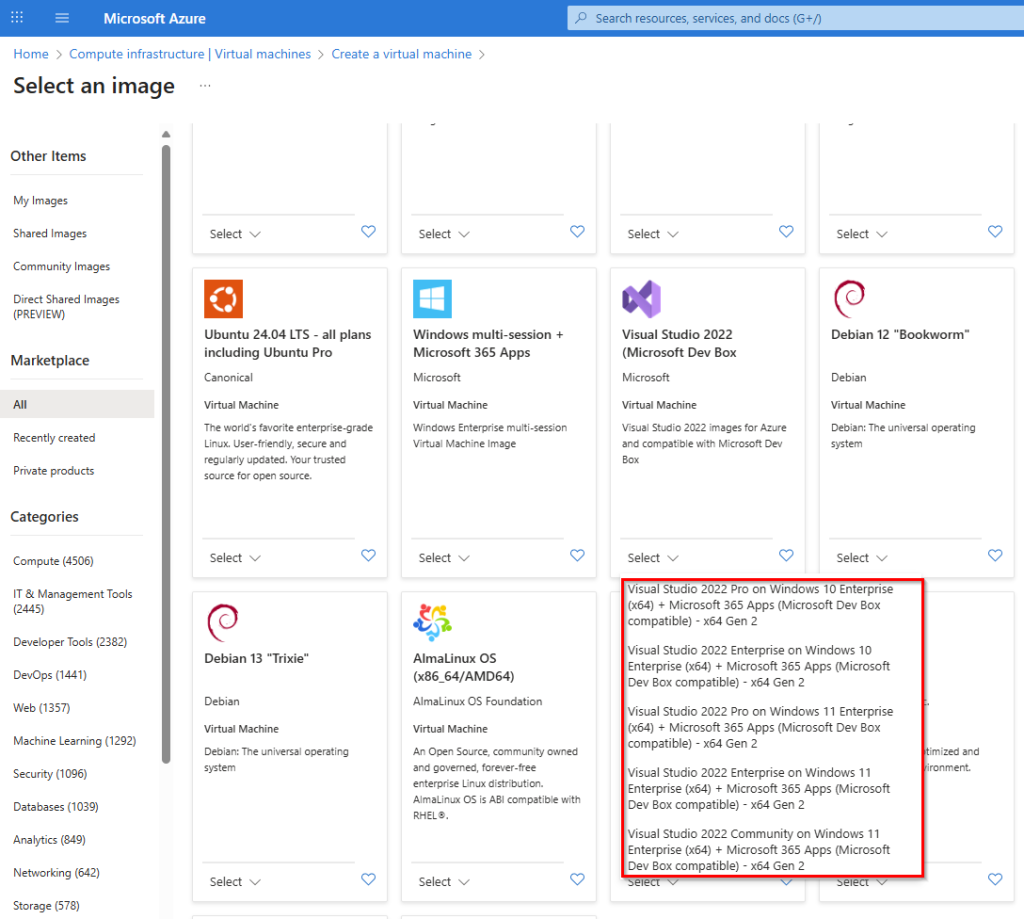
In the Virtual Machine Wizard, under Image, select “Show all images,” search for “Visual Studio 2022 (Microsoft Dev Box)“, and then select the image you want.
After selecting your image, the wizard should look like this:
Note: Please verify that the security type is set to “Standard“, as managed images do not currently support trusted boot.
Then complete the VM creation process with your settings.
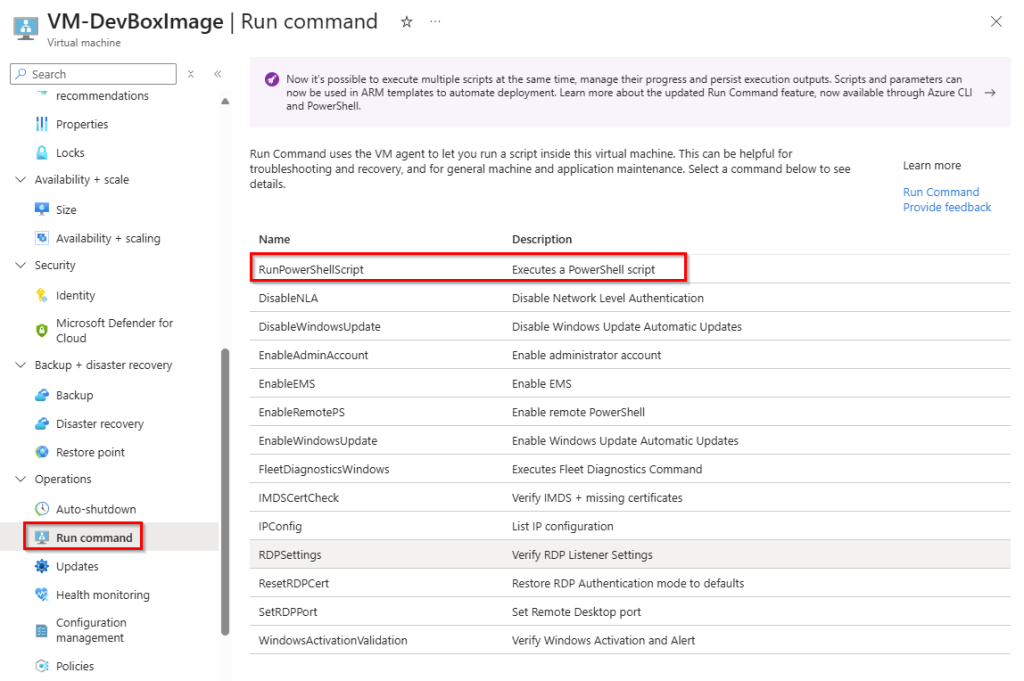
Go to your newly created virtual machine and open the “Run Command” option to execute the PowerShell command remotely via the Azure portal.
Run the following PowerShell commands to generalize the VM with Sysprep:
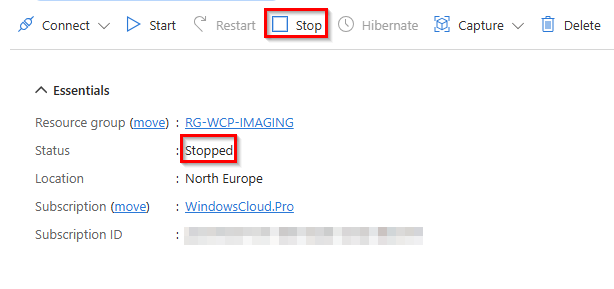
After successfully running the Sysprep command, the VM status will show “Stopped“, which indicates it is not yet fully deallocated. To complete the deallocation, click “Stop“.
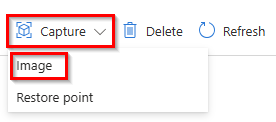
When the VM is in the “Stopped (deallocated)” state, you can click “Capture” and select “Image“.
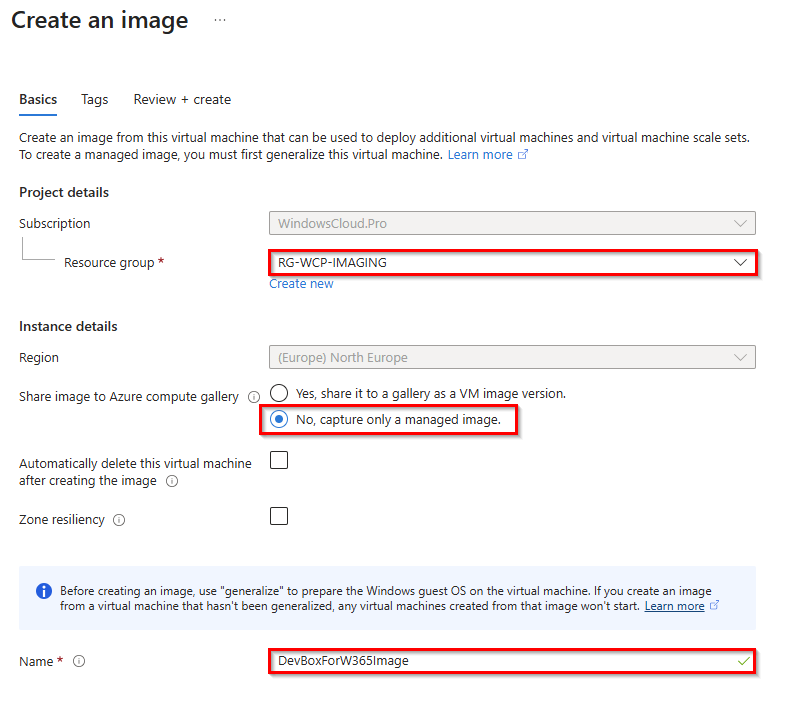
On the “Basics” tab, select your resource group, select “No, capture only a managed image” as the share image option, and enter a unique name.
Final step: Click “Review + Create” and wait for the managed image to be created.
Import a managed Image to Windows 365 custom images
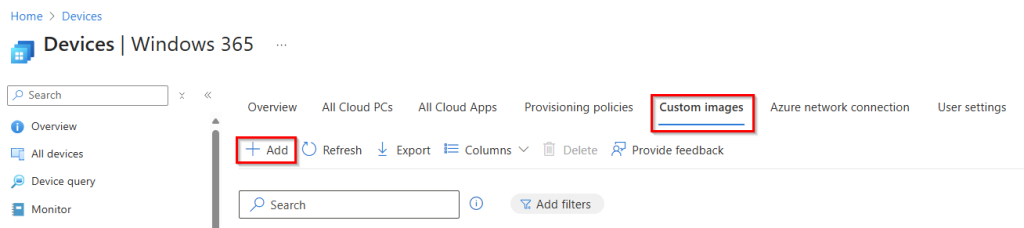
Open the Windows 365 admin panel in Intune and select “Custom images” and then “+ Add” to upload a new image version.
Enter an image name and version to identify your latest custom image version, then select your Azure subscription and source image (managed image).
Note: The Windows 365 service principal must have the Azure Subscription Reader role to read the managed images.
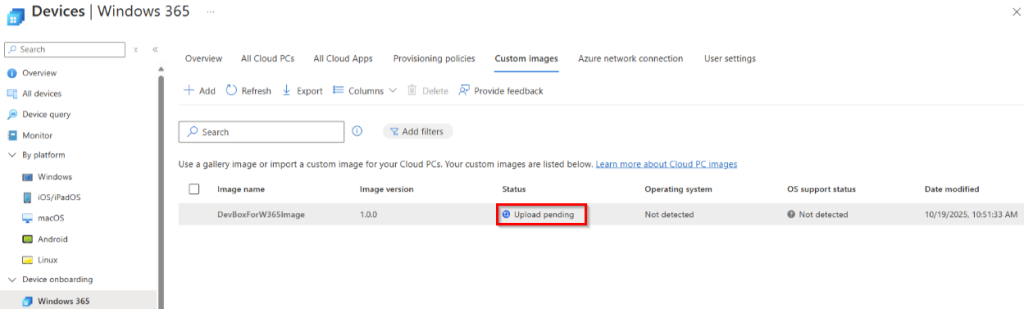
Click “Add” to start the upload process for a custom image.
The upload process takes a while, so you’ll have time to make yourself a fresh cup of coffee.
Deploy new Dev Box Cloud PCs
Once your custom image has been successfully uploaded, you can deploy new Dev Box Cloud PCs by creating a new Windows 365 provisioning policy.
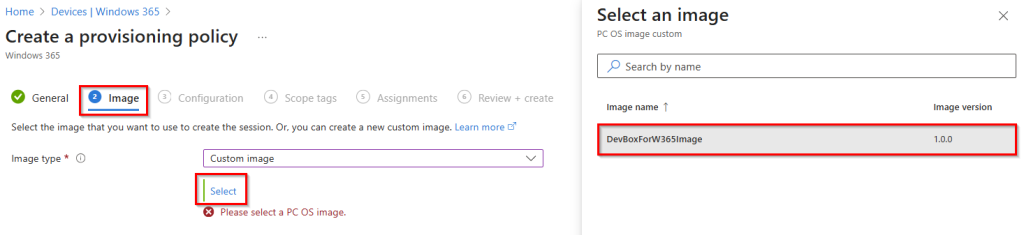
Fill in the general tab information with your preferred preferences and, on the “Image” tab, change the image type to “Custom Image” and select your image.
Continue with the creation of the provisioning policy so that the new Dev Box Cloud PC is assigned to your user group. Once the policy has been completed, the provisioning process should begin.
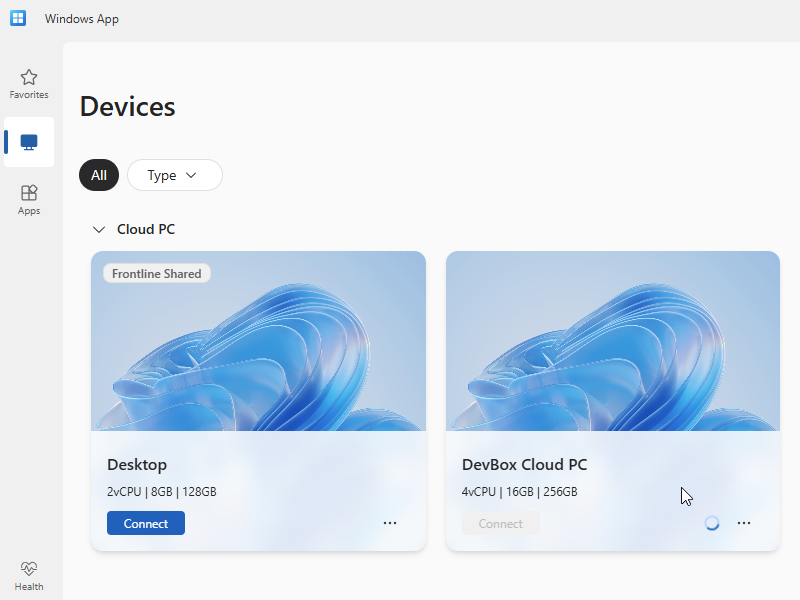
After a “short” provisioning time, the user can log in to the Windows app to connect to the new Dev Box Cloud PC.
Now the Cloud PC should look like a Microsoft Dev Box with all the developer tools installed.
Enjoy coding! 😉
Conclusion
As Microsoft transitions Dev Box capabilities into Windows 365, developers should prepare for this change by adapting their workflows. While new Dev Box deployments will end on 1st November 2025, leveraging managed images ensures continuity and access to essential developer tools.
By importing the Dev Box images into Windows 365 and deploying them to Cloud PCs, teams can maintain a consistent, ready-to-code environment without disruption.